Django Web Development: Configuring Static Files, Media, and Bootstrap Integration
In this guide, we will walk through the essential setup of static and media files in Django. Once configured, we will integrate the Bootstrap framework to transform our plain HTML into a professional-looking front-end, specifically focusing on the Product List page.
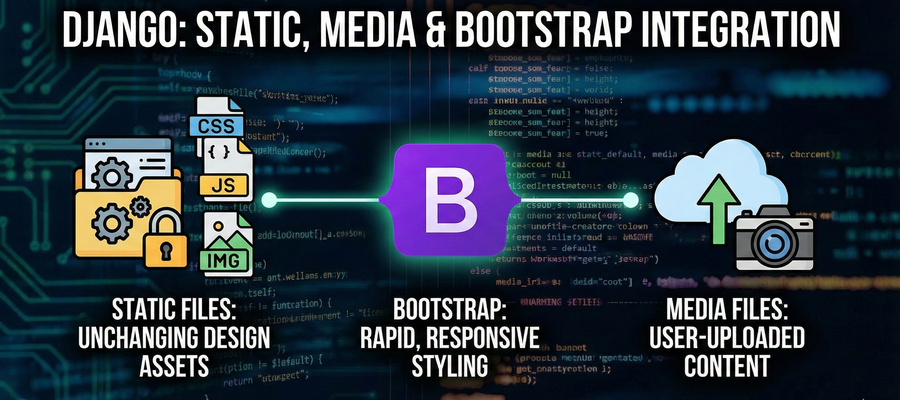
Understanding File Types in Django
Before diving into the code, it is important to distinguish between the two types of files we will be handling:
- Static Files: These are design-related files that remain unchanged during the production phase. Examples include CSS stylesheets, JavaScript files, and static images like logos.
- Media Files: These are files uploaded by users or administrators via the application. Examples include dynamic content like product images or user profile photos.
Step 1: Configuring settings.py
To allow Django to serve these files, we must configure the settings.py file.
First, ensure you import the os library at the top of your file:
import osStatic Files Configuration
Scroll down to the static files section. We need to define where Django should look for static files during development and where to collect them for production.
# The URL prefix for static files
STATIC_URL = '/static/'

# Locations where Django searches for static files
STATICFILES_DIRS = [
    os.path.join(BASE_DIR, 'static'),
]

# The location where static files are collected for production
STATIC_ROOT = os.path.join(BASE_DIR, 'staticfiles')Media Files Configuration
Next, configure the media settings to handle user uploads.
# The URL prefix for media files
MEDIA_URL = '/media/'

# The folder where uploaded files will be stored
MEDIA_ROOT = os.path.join(BASE_DIR, 'media')Global Templates Configuration
Since we are moving towards a global template structure, update the TEMPLATES setting to look for a root-level templates folder:
'DIRS': [os.path.join(BASE_DIR, 'templates')],Step 2: Serving Media Files in Development
Django does not serve media files automatically during development. We need to configure urls.py to handle this when DEBUG = True.
Open your project's main urls.py and add the following:
#projectfolders/urls.py

from django.conf import settings
from django.conf.urls.static import static

urlpatterns = [
    # ... your existing url patterns ...
]

# Serve media files only during development
if settings.DEBUG:
urlpatterns += static(settings.MEDIA_URL, document_root=settings.MEDIA_ROOT)Step 3: Directory Structure and Base Template
Create the following folders in your project root directory:
- static (Inside this, create subfolders: css, js, logos)
- media (This is where uploads will go)
- templates (For global HTML files)
Creating the Base Template
To avoid repeating code (like the <head> and <body> tags) in every file, we use Template Inheritance. Create a base.html file inside the global templates folder.
This file will act as the skeleton for your website:
#templates/base.html
{% load static %}
<!DOCTYPE html>
<html lang="en">
<head>
    <meta charset="UTF-8">
    <link rel="stylesheet" href="{% static 'css/styles.css' %}">
    <title>{% block title %}{{title}}{% endblock %}</title>
</head>
<body>

    {% block content %}
    {% endblock %}

    <script src="{% static 'js/script.js' %}"></script>
</body>
</html>Now, update your product_list.html to inherit from this base:
#templates/products/product_list.html

{% extends 'base.html' %}

{% block title %}Products{% endblock %}

{% block content %}
    <h1>Product List</h1>
    <ul>
        {% for product in products %}
            <li>
                <a href="{% url 'product_detail' product.id %}">
                    {{ product.name }} - Rs {{ product.price }} </a>
            </li>
        {% endfor %}
    </ul>
{% endblock %}Now, update your product_detail.html to inherit from this base:
#templates/products/product_detail.html

{% extends 'base.html' %}

{% block title %}Product - {{ product.name }}{% endblock %}

{% block content %}
    <h1>{{ product.name }}</h1>
    <p>{{ product.description }}</p>
    <p>Price: ₹{{ product.price }}</p>
    <p>Stock: {{ product.stock }}</p>

    <a href="{% url 'product_list' %}">Back to list</a>
{% endblock %}Using the Django Template Language (DTL)
This table summarizes key Django Template Language tags for efficient template organization. We'll focus on tags like extends for inheritance and include for reusability to build modular templates.
Django Template Language – Layout & Static Reference
| Feature | Syntax |
|---|---|
| Base template inheritance | {% extends "base.html" %} |
| Load static tag | {% load static %} |
| Static file path | {% static "path/to/file.ext" %} |
| Include another template | {% include "partials/header.html" %} |
| Dynamic page title block | {% block title %}{{ title }}{% endblock %} |
| Block definition | {% block content %}{% endblock %} |
| Using a block in child template | {% block content %} ... {% endblock %} |
| Overriding only the title in child template | {% block title %}Product List{% endblock %} |
| Output variable (DTL) | {{ variable }} |
| Output variable inside HTML attributes | <img src="{{ item.image.url }}"> |
Step 4: Integrating Bootstrap
To style our application quickly, we will use Bootstrap. The easiest way to integrate it during development is via CDN.
Update your base.html to include the Bootstrap CSS in the <head> and the JS script before the closing <body> tag.
#templates/base.html
<head>
    <!-- Other codes -->
    <link href="https://cdn.jsdelivr.net/npm/bootstrap@5.3.0/dist/css/bootstrap.min.css" rel="stylesheet">
    <link rel="stylesheet" href="{% static 'css/styles.css' %}">
</head>
<body>
    <!-- Other codes -->
    <script src="https://cdn.jsdelivr.net/npm/bootstrap@5.3.0/dist/js/bootstrap.bundle.min.js"></script>
</body>Step 5: Update the Product Model for Images
To display product images, we need to add an ImageField to our Product model.
- Install Pillow: Django requires the Pillow library to handle images.
pip install Pillow- Update models.py:
#Products/models.py
class Product(models.Model):
    # ... other fields ...
image = models.ImageField(upload_to='products/', null=True, blank=True)- Migrate Changes:
python manage.py makemigrations
python manage.py migrateYou can now log in to the Django Admin panel and upload images for your products.
Step 6: Designing the Product List Page
Finally, let's use the Bootstrap Grid System and Card Components to display our products elegantly.
Update product_list.html:
{% extends 'base.html' %}

{% block title %}Products{% endblock %}

{% block content %}
<div class="container py-5">
    <h1>Product List</h1>
    <div class="row">

        {% for product in products %}
        <div class="col-auto">
            <div class="card" style="width: 18rem;">
                {% if product.image %}
                <img src="{{ product.image.url }}" class="card-img-top" alt="{{ product.name }}">
                {% endif %}
                <div class="card-body">
                    <h5 class="card-title">{{ product.name }}</h5>
                    <p class="card-text">{{ product.description }}</p>
                    <a href="{% url 'product_detail_slug' product.slug %}" class="btn btn-primary">Go Product</a>
                </div>
            </div>
        </div>
        {% endfor %}

    </div>
</div>
{% endblock %}Key Logic:
- Grid System: We use a row container and col-md-3 columns. This creates a responsive grid where four products appear in a row on medium devices.
- Conditional Image Rendering: The {% if product.image %} tag ensures that the application doesn't crash if a product is missing an image.
Conclusion
We have successfully configured static and media files, set up a global base template, and integrated Bootstrap to create a responsive product gallery.
Do you need side hustle?
Get Paid to Share Your Opinion: User Interviews Can Get You Quick Cash
Ever heard of User Interviews? It's a platform that pays you for your feedback on products and services. The best part is that you can get a bonus just for signing up and completing your first study. I've already earned money with them, and you can, too.
Click here to sign up and get your bonus! Please wait until Sign Up page load.
Disclaimer: Referral bonus amounts are subject to change. The bonus is awarded after you complete your first paid study and may take a few days to process. All terms and conditions are set by User Interviews, and it's best to check their official site for the most up-to-date program rules.
Earn Cash for Your Opinions and a Bonus to Boot: Try Respondent.io
Respondent is a top platform that pays you for taking part in market research and user interviews. I've used it to find great paid studies, and you can, too. Their referral program is a fantastic way to earn more: when a friend you refer signs up and completes a study, you both get a bonus. It’s a great way to earn a little extra for yourself while helping a friend find paid work.
Click here to sign up and get your bonus!
Disclaimer: Referral bonus amounts and terms are subject to change by Respondent.io. The bonus is typically awarded after the referred friend completes their first paid study. Please check their official referral program page for the most up-to-date details.
What's Next?
In the next video, we’ll cover User Authentication
you’ll learn how to add signup, login, and logout functionality to your Django project using Django’s built-in authentication system.
We’ll create Bootstrap-styled forms, update the navbar to show Login/Logout links, and protect pages using login_required.
Learn More